
If your dogs suddenly appear every time you open the peanut butter jar, this recipe is going to make them very happy. I recently made a big batch of these homemade training treats, and judging by the wagging tails and laser-focused stares from my two Dalmatians (yes, those two eager assistants you see in the background), they were a hit. These little bites are packed with wholesome ingredients, baked to a satisfying crunch, and perfectly sized for training.
Whether you’re teaching “sit,” “stay,” or just want a quick, easy treat for good behavior, these peanut butter training snacks are up to the task.

Why I Started Making My Own Dog Training Treats
Like most dog parents, I want the best for my pups—especially when it comes to what goes into their bodies. Store-bought treats can be convenient, but they often come with preservatives, fillers, or ingredients I’m not comfortable with. And while some are great in theory, they’re either too big, too greasy, or they crumble into dust when I try to carry them in a pocket.
That’s why I started baking these tiny, uniform training treats using a silicone mold. They’re clean, compact, and durable—ideal for rewarding over and over during training without overfeeding. And the best part is, I know exactly what’s in them.
Ingredients
This is a basic peanut butter treat dough that’s easy to work with, customizable, and dog-approved.
- 1 cup natural peanut butter (unsalted, unsweetened, and xylitol-free)
- 1 large egg
- 2 tablespoons unsweetened applesauce or mashed banana
- 1/4 cup water (add more as needed)
- 1 ½ cups oat flour (blend oats in a food processor if you don’t have flour)
- ½ cup whole wheat flour (optional, adds firmness)
- Pinch of ground cinnamon (optional, smells amazing while baking)
You can swap out the applesauce for pumpkin puree or adjust the flours if your dog has specific sensitivities. This recipe is meant to be flexible and forgiving.
Tools You’ll Need
These treats are baked in bulk using a silicone baking mold that creates dozens of tiny bites in one go. Here’s what I use to keep things efficient:
- Silicone dog treat mold (the kind with mini cavities, often labeled for training treats)
- Baking sheet or tray
- Mixing bowl and spatula
- Measuring cups
- Optional: dough scraper or butter knife for smoothing the dough
The silicone mold really is the game-changer. You get uniform size, easy removal, and minimal mess.
Step-by-Step Instructions
1. Preheat the Oven
Preheat your oven to 325°F (165°C). Place your silicone mold onto a metal baking tray for stability. Lightly grease the mold if it tends to stick.
2. Make the Dough
In a mixing bowl, stir together the peanut butter, egg, and applesauce or banana until smooth. Add the oat flour, optional whole wheat flour, and cinnamon. Gradually add water and mix until the dough is thick but pliable—not dry, not sticky.
You’re aiming for a dough that’s soft enough to press into molds, but firm enough to hold its shape. If it’s too stiff, add a little more water one tablespoon at a time.
3. Fill the Mold
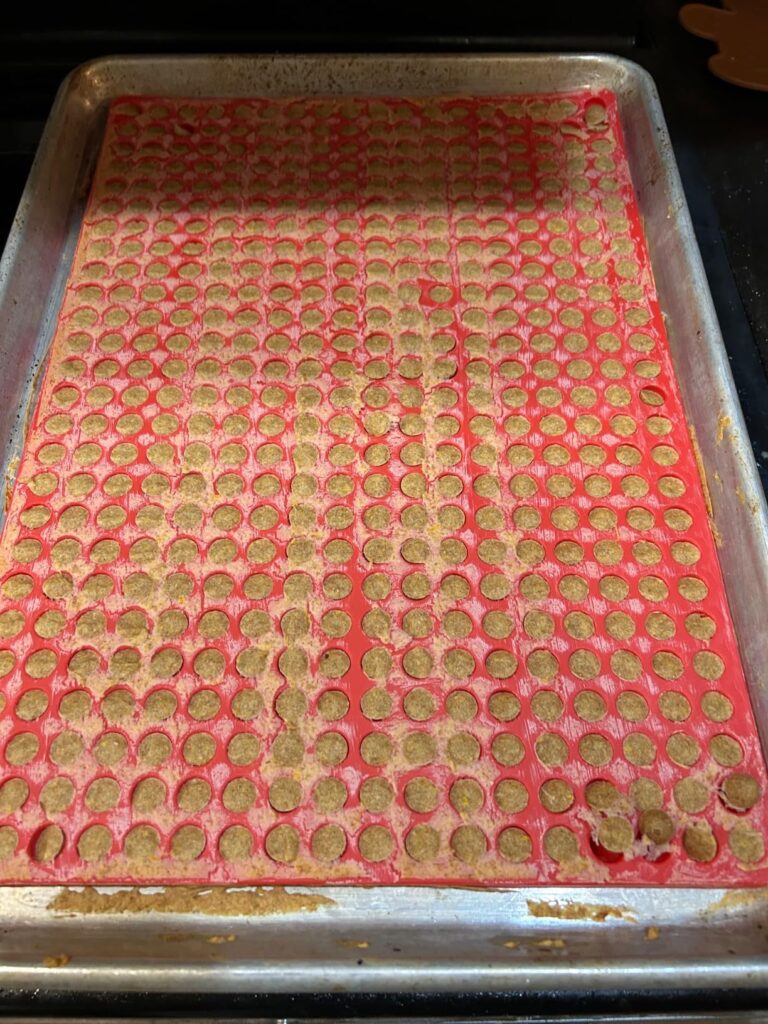
Spoon or spread the dough over your silicone mold, pressing it firmly into each cavity. I use a spatula or my fingers to work it in. Scrape off any excess dough from the top to keep the treats uniform and ensure they bake evenly.
The mold shown in the photos has over 400 small cavities. Filling it takes a few minutes, but once you get the hang of it, it’s easy and even kind of relaxing.
4. Bake
Bake for 22 to 30 minutes. The time depends on your oven and how crispy you want the treats. For a crunchier texture, leave the tray in the oven after turning it off for 30–60 minutes to dry them out more thoroughly.
Crunchy treats last longer, don’t crumble in your pocket, and dogs love the texture. That extended oven time really helps lock in the crunch.
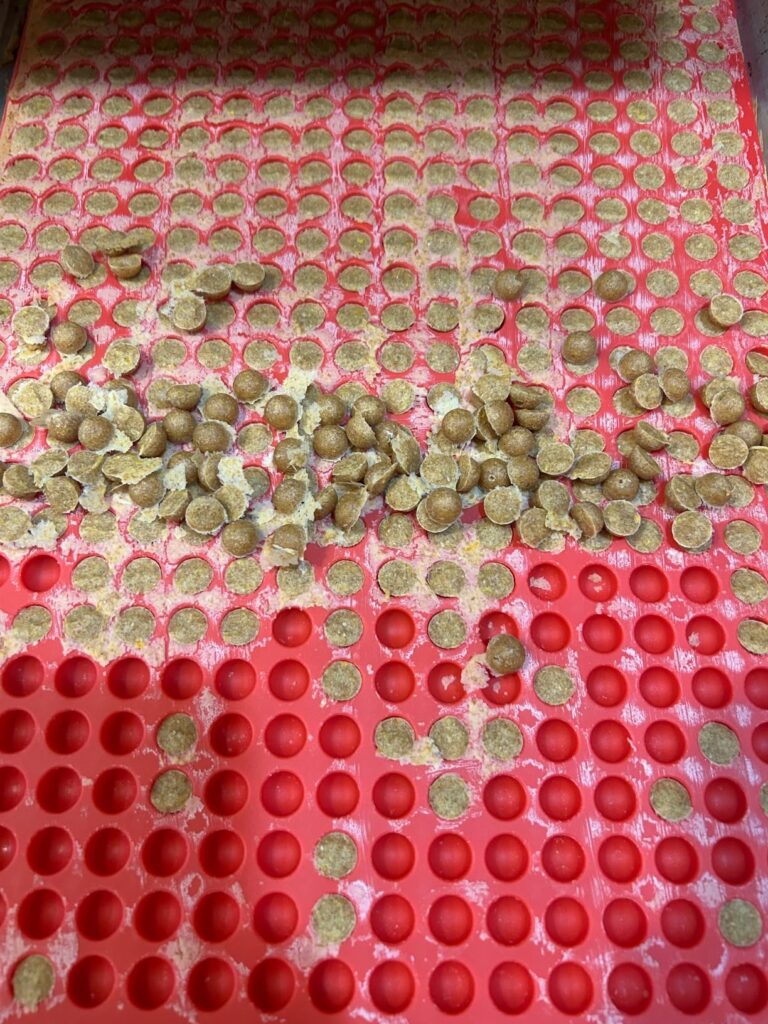
5. Cool and Release
Let the tray cool fully before removing the treats. Once cooled, pop them out of the mold by gently pressing from the bottom. Most should fall out easily. Any that stick can be coaxed out with the back of a spoon.
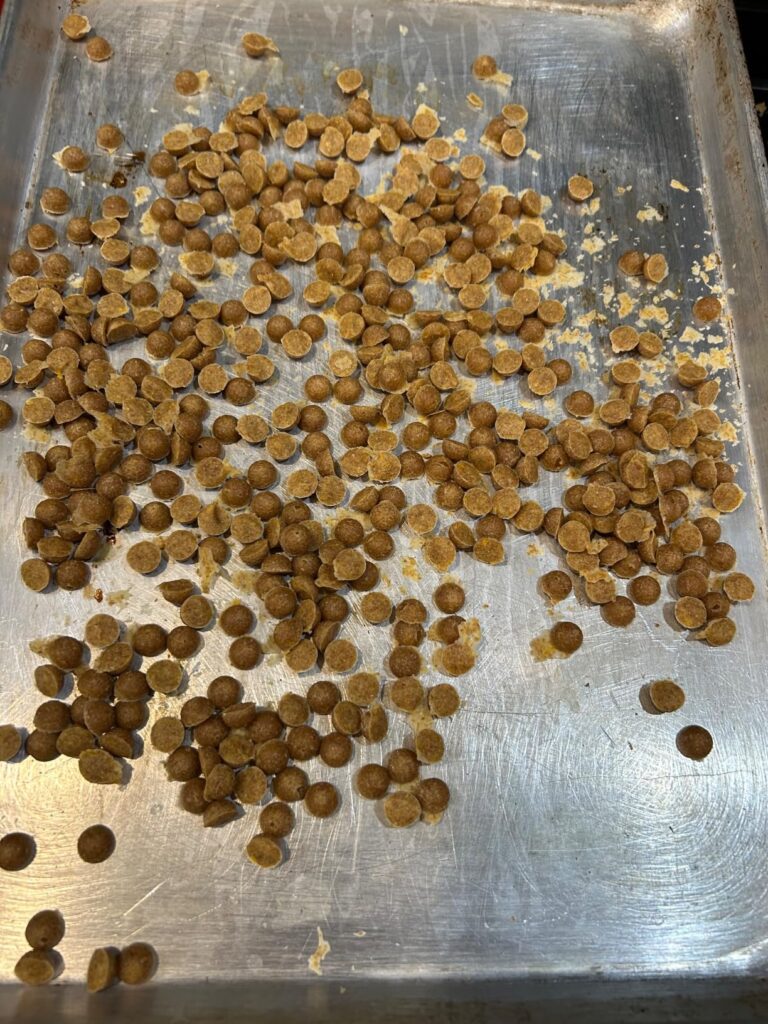
From there, transfer them to a clean baking sheet to cool completely. You’ll notice how neat and uniform they are—perfect for portion control and consistent training.
Storage and Shelf Life
Once baked and cooled, these treats are dry and shelf-stable for a good while.
- Store in an airtight container at room temperature for up to 2 weeks
- Refrigerate for up to 3 weeks
- Freeze for up to 3 months
I keep a container in the kitchen, another in the car, and a small pouch in my dog-walking bag. They hold up well, don’t get greasy, and you can thaw them as needed straight from the freezer.
Customization Ideas
The base recipe is fantastic, but if your dog has specific tastes or dietary needs, here are a few modifications you can try:
- Replace applesauce with pumpkin puree for digestive benefits
- Use mashed sweet potato for added fiber
- Add chopped parsley or mint for breath freshening
- Mix in ground flaxseed or chia for a nutrition boost
- Try grated carrot or zucchini for veggie enrichment
- Add a sprinkle of shredded cheese for extra excitement
Just be sure to avoid any toxic ingredients like onions, garlic, nutmeg, raisins, or anything containing xylitol.
Training-Friendly and Travel Ready
These treats are exactly the size I want when I’m actively training my dogs. They’re easy to carry in a pouch or even your pocket. They don’t leave oily residue or crumbs everywhere, and because they’re bite-sized, you can give multiple rewards without worry.
They’re also a lifesaver during walks or at the vet. I’ve used them to distract during nail trims, to encourage polite greetings, and as a reward for ignoring the neighbor’s cat.
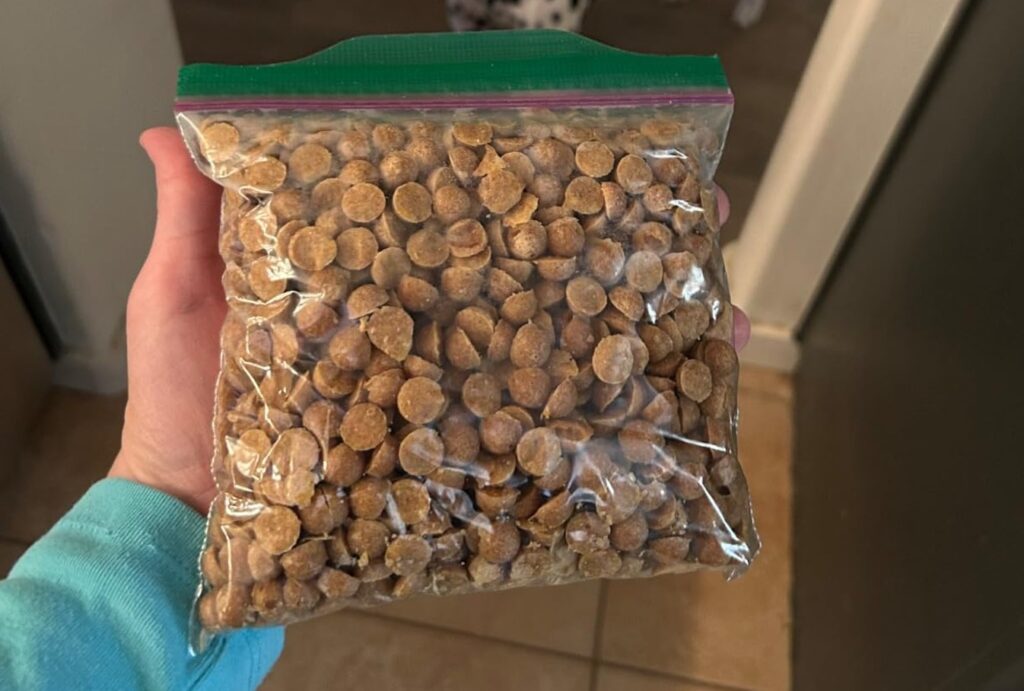
Behind the Scenes: Photos from My Kitchen
You can see in the photos above how these treats come together step-by-step. I fill the silicone mold with the dough, bake them on a tray, and then pop them out once they’re crisp and cool. That final bag shot? It’s my “treat stash” for the week—sealed, labeled, and ready to go.
You’ll also catch my two Dalmatians giving me their full attention during the process. They know exactly what those trays mean. And honestly, I love how these little kitchen projects bring us closer together.
Troubleshooting Your Treats
Even though this recipe is simple, there are always a few hiccups that can happen when working with silicone molds or baking in bulk. Here are some common issues I’ve run into and how I solved them:
1. Treats Stick to the Mold
This usually happens if the dough is too wet or the mold wasn’t greased. Try these quick fixes:
- Lightly spray the mold with non-stick oil before pressing the dough in.
- Let the treats cool completely before trying to remove them—they pop out easier once they’ve firmed up.
- If they’re still soft, toss the tray back in the oven at 250°F for another 10–15 minutes to crisp up.
2. Dough Is Too Sticky or Too Dry
Texture is everything. If your dough is sticking to your hands or the spatula:
- Add a tablespoon of flour (oat or wheat) at a time until it firms up.
If it’s too crumbly and won’t press into the mold:
- Add a teaspoon or two of water or unsweetened applesauce and mix again.
A smooth, moldable dough makes the whole process easier.
3. Uneven Browning
This usually means your oven’s heat isn’t circulating evenly. Try rotating your tray halfway through the bake time. And remember, the thickness of each treat is controlled by how well the dough is pressed into the mold—consistency matters.
Scaling the Recipe
One of my favorite things about this recipe is how easily you can scale it up or down. When I use the mold that makes 400 mini treats, I double the recipe so I can fill it completely and not waste oven space.
Want to bake just a small batch? Halve the recipe, or refrigerate unused dough for up to three days.
Here’s a quick scale reference:
| Batch Size | Peanut Butter | Egg | Oat Flour | Whole Wheat Flour | Water |
|---|---|---|---|---|---|
| Small (Half) | 1/2 cup | 1 | 3/4 cup | 1/4 cup | 2 tbsp |
| Standard | 1 cup | 1 | 1½ cups | 1/2 cup | 1/4 cup |
| Large (Double) | 2 cups | 2 | 3 cups | 1 cup | 1/2 cup |
This is especially handy if you’re prepping for holidays, dog birthdays, or just want a month’s worth of treats in one go.
Make It a Fun Routine
Every time I pull out the red silicone mold, my dogs know what’s about to happen. It’s become one of our favorite rituals. While the treats bake, we hang out in the kitchen. I sip coffee, they sniff the air and wag their tails hopefully. It’s a small thing, but it turns an ordinary day into something special.
There’s also a peaceful satisfaction in seeing a whole tray of golden, crunchy little bites come out of the oven. Knowing I made them myself, with ingredients I trust, is just the icing on the cake (or, in this case, the crunch in the treat).
Treat Presentation and Gifting
These also make wonderful homemade gifts. I’ve shared them with friends, neighbors, and even our local rescue shelter. Here’s how I like to present them:
- Small mason jars tied with a ribbon and a label
- Paper treat bags with a handwritten note
- Reusable tins or containers with dog-themed stickers
You can include the ingredient list too, especially for pups with sensitivities. Homemade dog treats are thoughtful, useful, and always appreciated by fellow dog lovers.
Fun Ways to Use These Treats
These aren’t just for formal training sessions. Here are a few creative ways I’ve used these peanut butter treats:
- Puzzle Toys: They’re the perfect size for Kongs, snuffle mats, or treat-dispensing balls.
- Scavenger Hunts: Hide a few around the house or yard and let your dog use their nose.
- Behavior Reinforcement: Keep a handful in your pocket on walks to reward calm behavior or ignoring distractions.
- Vet Visits or Grooming Rewards: These little guys go a long way in stressful situations.
Because they’re dry and not greasy, you won’t mind keeping a few in your jacket or car for surprise moments.
Nutritional Considerations
Let’s talk briefly about pet nutrition. These treats are intended for supplemental feeding—not a full meal replacement. But because they’re made with whole food ingredients and no preservatives, you can feel confident about what your dog is eating.
- Peanut butter provides healthy fats and protein
- Oat flour is gentle on sensitive stomachs
- Egg adds protein and helps bind the dough
- Applesauce or banana adds natural sweetness and moisture
Each treat is only about 2–4 calories depending on how big your mold cavities are, which makes them perfect for repetitive training. Just remember to adjust your pup’s regular meals slightly if you’re handing out a bunch during the day.
Looking Ahead: Seasonal Variations
If you like to match your baking with the seasons, try these:
- Fall: Use pumpkin puree and a dash of cinnamon and ginger
- Winter: Mix in some finely chopped cranberries (unsweetened, dried)
- Spring: Add fresh mint or parsley for a garden-inspired twist
- Summer: Swap in banana and sprinkle in shredded coconut
With the same base dough, you can create endless variations throughout the year. Your dog won’t mind a bit of variety, and it keeps things fun in the kitchen.
Join Me on Pinterest
If you love trying new homemade dog recipes, I’d love for you to check out my Pinterest page: https://www.pinterest.com/dogcookery/
I share:
- Treat ideas for every occasion
- Seasonal recipes
- Dog-safe ingredient substitutions
- Storage hacks
- Cute packaging and gifting inspiration
There’s a whole community of fellow dog-loving bakers there, and it’s such a great place to connect, share, and get inspired.
Final Thoughts
Making your own dog treats might feel like an extra step, but once you do it a couple of times, it becomes second nature. You’ll have peace of mind, you’ll save money, and most importantly, you’ll be giving your pup something you made with love.
These peanut butter crunch training treats have become a staple in our home, and I hope they do the same for yours. Whether you’ve got a rambunctious puppy learning the ropes or a senior dog who deserves something special, this recipe delivers every time.
If you give it a try, let me know how it turns out—and don’t forget to share a photo of your happy taste tester.
Until next time, happy baking and tail wags all around.
Looking for more inspiration? Head over to my Pinterest board for even more homemade dog treat recipes and ideas.
Print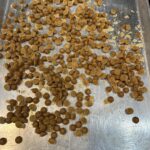
Bold and Crunchy Peanut Butter Training Treats Recipe for DogsTiny Bites, Big Flavor – Your Pup’s New Favorite Homemade Reward
- Total Time: 1 hour
- Yield: 400 mini treats 1x
- Diet: Low Salt
Description
Crunchy, bite-sized peanut butter dog training treats made with natural ingredients. Perfect for rewarding good behavior or training sessions.
Ingredients
- 1 cup natural peanut butter (unsweetened, unsalted, xylitol-free)
- 1 large egg
- 2 tablespoons unsweetened applesauce or mashed banana
- 1/4 cup water (more as needed)
- 1 ½ cups oat flour
- 1/2 cup whole wheat flour (optional)
- Pinch of ground cinnamon (optional)
Instructions
- Preheat oven to 325°F (165°C). Lightly grease silicone mold and place on baking tray.
- In a mixing bowl, stir together peanut butter, egg, and applesauce or banana until smooth.
- Add oat flour, whole wheat flour, and cinnamon. Gradually add water and mix until dough is firm but pliable.
- Press dough firmly into silicone mold cavities. Scrape off excess dough with a spatula or flat edge.
- Bake for 22–30 minutes until golden and firm.
- Optional: Turn off oven and leave tray inside for 30–60 minutes to dry out for extra crunch.
- Allow treats to cool completely before removing from mold.
- Store in airtight container at room temperature, in fridge, or freeze for long-term use.
Notes
- Ensure peanut butter is xylitol-free for dog safety.
- If dough is too sticky, add more flour; if too dry, add more water or applesauce.
- To prevent sticking, cool treats fully before removing from mold.
- Use different molds or flavors to create seasonal variations.
- Prep Time: 20 minutes
- Cook Time: 30 minutes
- Category: Dog Treats
- Method: Baking
- Cuisine: Homemade
Nutrition
- Serving Size: 10 treats
- Calories: 35
- Sugar: 0.5g
- Sodium: 5mg
- Fat: 2g
- Saturated Fat: 0.5g
- Unsaturated Fat: 1.2g
- Trans Fat: 0g
- Carbohydrates: 3g
- Fiber: 0.5g
- Protein: 1.2g
- Cholesterol: 5mg
Keywords: peanut butter dog training treats, dog recipes, homemade dog treats, pet nutrition, dog treat recipe, crunchy dog treats
